Instead of cruising Alaska’s epic coastline, I once spent five interminable days in the port of Kodiak awaiting a replacement part for a failed windlass. As I sat there, unable to take advantage of the sunny days, I was reminded that many boaters fail to realize that electric windlasses have a maintenance schedule.
This schedule often includes partial disassembly, cleaning, inspection, and lubrication of the shafts and clutches. By far, most failures are the result of deferred maintenance and inspections. Familiarize yourself with the maintenance requirements for your make and model, and follow them.
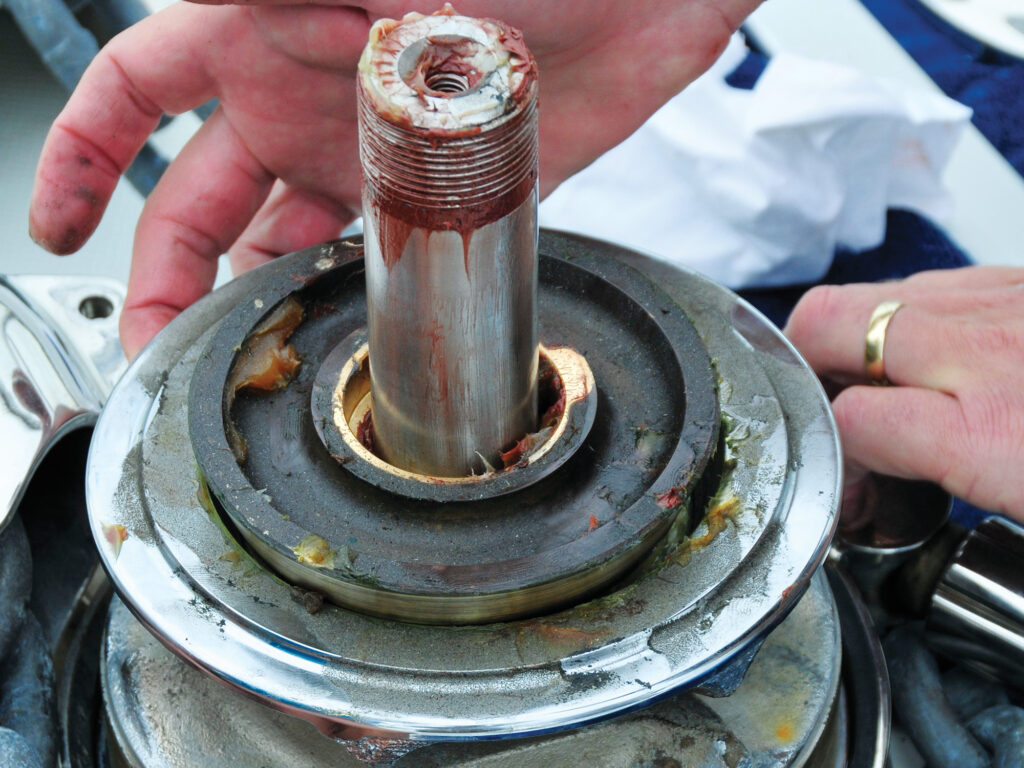
For windlasses with oil-filled gearboxes, this includes checking the oil level, and checking the gearbox for oil leaks. If the oil is milky, then it’s contaminated with water, a problem that typically requires removal of the windlass and a rebuild, including the replacement of shaft seals. If your anchor rode creates a rainbow sheen on the water when it’s first deployed, then there’s a good chance your gearbox is leaking oil.
Beyond that, don’t assume that your windlass has been installed correctly just because it works, even if you purchased your vessel new. After you have reviewed the service requirements, look at the installation instructions, and then scrutinize your setup for deficiencies.
Common installation errors involve mounting and fasteners. Most fiberglass vessels utilize a cored deck structure. Unless the builder anticipated the installation, wherever the core is penetrated, it must be removed and backfilled with thickened epoxy (this is called “core closeout”). Missing this step can lead to water penetrating the core and deteriorating the balsa or plywood. Even if the core is synthetic and rot-proof, it can be crushed where windlass fasteners pass through it, in turn weakening the deck structure.

These rules apply to the hole through which the chain passes, as well as to holes that are drilled for windlass mounting fasteners. The large chain hole must be properly closed out with solid fiberglass or thickened epoxy. In many cases, I encounter mere coats of polyester or epoxy resin, an approach that is woefully inadequate for any closeout, particularly when it must withstand abrasion from the anchor rode moving in and out of the chain locker.
Most windlass manufacturers recommend using a backing plate to help distribute the load to the deck. This backing plate can be made from prefabricated fiberglass or epoxy sheet called GPO-3 or G10, stainless steel or aluminum, in that order of preference. Timber is less than ideal, and under no circumstances should it be a solid block, regardless of species, because it is prone to cracking. Backing plates should not be bedded; doing so can trap water in fastener holes, leading to crevice corrosion.
Speaking of fasteners: Those used for windlass installations should be stainless-steel bolts, not threaded rod, with heads suitable for the windlass surface. This usually means hex-head cap screws. If the housing is painted aluminum, then ensure that the heads are bedded in sealant to prevent paint failure.
It is imperative that the fasteners’ shank diameter matches that of the holes in the windlass frame. Undersize fasteners will allow a windlass to shift, and they lack the necessary tensile strength that the manufacturer anticipated.
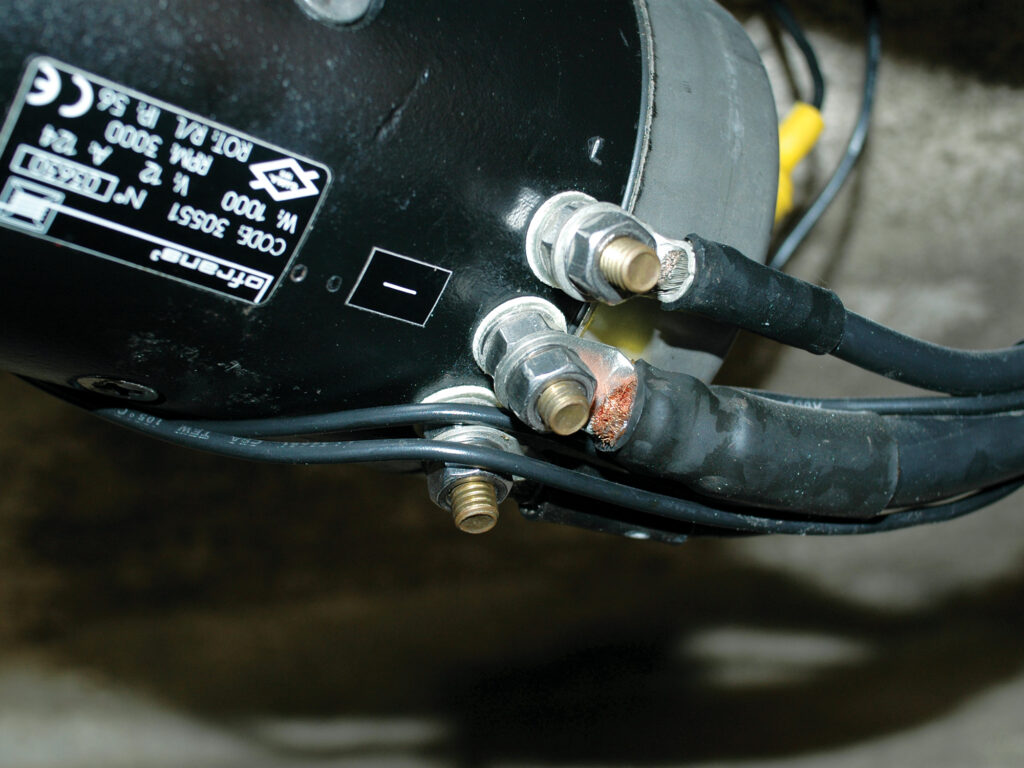
Review the wiring—the high-current, big cables that supply the motor, and the low-current, small wires used for the controls. All positive post and ring terminal connections should be booted to prevent short circuits. Connections should be clean, tight and corrosion-free. If corrosion is present, then you must disassemble, clean and reassemble the connection, ideally using a conductive or dielectric grease. Also make certain that the holes in the ring terminals match the diameter of the studs or screws where they interface. Once the connections are complete, spray with corrosion inhibitor, and give the motor housing a coating as well.

Finally, if your windlass uses a stripper bar to separate the chain from the wildcat or chain wheel, ensure that it is not distorted and that it is centered in the wheel’s groove. —Steve D’Antonio
Steve D’Antonio offers services for boat owners and buyers through Steve D’Antonio Marine Consulting.